Sunday, July 28, 2013

Vol. 2 Mixed Media and Found Objects - August

Happy Sunday to all of you!  It is difficult to believe that August is just a few days away.  It seems as though we had a never ending winter, with snow right up until May and then we had weeks on end with rain.  From there it went directly into 90 degree weather for a few weeks, and now we are in the 50s and I am digging out my fall sweaters.  It seems as though our summer skipped right over us and now we are at the doorstep of autumn.  Although, fall is my favorite time of year, I would have liked summer to last a little longer than a few weeks.  But, who knows it is Wisconsin after all and weather is unpredictable at best; we did have a blizzard in May...

In my Glossi post for last month, I might have....sort of...mentioned that I was going to put out a bi-monthly Glossi, but......I had so much fun putting it together last month that I started another one and it was completed before I knew it so, I am going to post it.  I cannot guarantee that I will have one in September as I am struggling with an artists block right now, but perhaps the art gods will be kind and open a window of inspiration.  Next weekend I am heading into the cities for a self-planned art and botanical garden tour with my camera and sketch pad in hand.

I have posted a link to the Glossi on the right hand side of the blog.  Check it out, it is better than the first one!   


Tuesday, July 23, 2013

What Sets Your Jewelry Apart?

One of the questions I ask myself, as do many of you is, "what sets my jewelry apart from the other designers?"  I have read so many articles and posts about making your jewelry stand out.  I think your designs should speak volumes, but I also think attention to presentation detail should also say something about your jewelry.  I have learned the importance of shipping your treasures to the eagerly awaiting buyers in beautifully wrapped or taped boxes with brightly colored tissue, but what about presentation at craft fairs or boutiques?  When I go boutique or craft fair shopping, I am always drawn to the jewelry section (lol...), and besides the design of the piece, one of the first things I notice is the tag.  How does the tag represent the jewelry or the designer?  I find that I am more drawn to, and want to purchase more, the pieces with the colorful and professional looking tags.  So, I decided to make a change to how I present my pieces by making tags that are colorful, look professional, and say I took some time to pay attention to the details.  I took heavy-weight stiff cardstock, added eyelets, and beautiful cotton string to them.  They measures a little over 1/2 inch x a little over 1/4 inch, just the perfect size.

I also will be listing the tags on my findings site at purplefishclaybeads.etsy.com.  Currently, all of the tags have silver-tone eyelets.  They will be available for purchase @ $3.00 per pack of 25 (plus $3 shipping).  You can select any one of the eight colors of tags and match it with any one of the four colors in thread.  I will be adding more eyelet, thread, and cardstock colors in the future - otherwise if you have a specific color in mind, send me over and e-mail and I will be happy to work with you.   


Friday, July 19, 2013

Interview with Jen from Weekend Jewelry and My First Giveaway!


http://blog.eastmanhouse.org/wp-content/uploads/2011/11/Casablanca-C-622-363x454.jpg 
Vintage jewelry, who doesn’t love the sparkle of rhinestones from the past? Watching Casablanca began my journey, as Elsa (Ingrid Bergman) walked into Rick’s "Cafe Americain" wearing a beautifully tailored suit and jewelry that sparkled with a stunning blindness under the camera lighting; I was hooked on the sparkle. When I first started designing jewelry much of my inspiration came from vintage jewelry with its elegant lines and gorgeous clusters of rhinestones and pearls that swept across their settings. As my designing progressed, I began introducing mixed media, adding leather and other natural materials to the rhinestones. In my never-ending search for rhinestones, glass, and vintage findings, I came across an Etsy shop called “weekendjewelry1”. The shop is owned by Jen Lownie and was established in 2006. She sells beautiful glass and rhinestone gems that have loop settings so all you need is your own design or, if you want something simple, add a pair of ear wires and “Voila” you have instant jewelry with sparkle!  Jen was kind enough to grant me an interview. Because we are both named Jen, I am going to use PFS for my questions.


***** 


https://img0.etsystatic.com/022/0/22319073/icm_fullxfull.28896554_oph13vr64tck0owkko8c.jpg


PFS: What inspired you to start your vintage glass and rhinestone shop?

Jen:
I've been making jewelry for years. It used to be all semi-precious and precious gemstones, precious metals, etc. I only wanted to use the Real Stuff - yes, I was one of those people. But it was SO expensive, and lots of times the quality of the gems I would afford was terrible. Then by accident I stumbled on some lovely old vintage glass jewels. And they were sparkly and well-made and over 50 years old.

Well I love the idea of vintage and re-purposing things, or giving new life to old things. So I started searching for vintage stones especially, and got hooked. And then I found some really good wholesale sources and thought, hey, I could sell these and make some money too - so I wouldn't just be *spending* money all the time! So I'm gradually phasing out all my gemstone jewelry - and selling pretty rhinestones :-)

PFS: How did you decide on your shop name?

Jen:
I didn't give it nearly enough serious thought, probably. I just thought, hmm, everybody loves the idea of a Weekend. You think "weekend" and you think of fun stuff. So "Weekend Jewelry" got born.

PFS: How do you decide the colors and styles you have available?

Jen:
Honestly I'm like any business owner. I listen to my customers and try to find things they want. And I'm always searching for *quality* (that doesn't cost a fortune). Some of my rhinestones are new, and some are vintage - it depends on what I can find. Half of my customers want to be able to re-order stones, and often that means new jewels - because it can be very hard to find the same rhinestones, a year later, with vintage.

PFS: What is the most difficult part, for you, of having an online store - and what is the best part of having an online store?

Jen:
I miss the in-person interaction with my customers that I got when I did a lot of craft shows. Talking and joking with customers was definitely the best part of the shows.

It sounds funny, but that's the best part of online selling, too - talking with customers. I have met some of the coolest people ever, through Etsy. And it's totally fun to have people all over the world order my jewelry supplies - and then let me know how happy they are with their purchase.

PFS: You have over 17,000 sales. Other than a great product, what else do you think has helped you achieve such great success?

Jen:
It sounds simple but it's really important: talk to people. Try to help them solve their problem. If they need something you haven't got, see if you can find it. If they need 7 sets of rhinestones for a bridal order, make sure that you send ones that really match. (Don't laugh, with rhinestones, especially vintage, that can be a challenge.) Remember that all business is personal to the person spending the money!

PFS: What other social medias do you follow?

Jen:
Oh boy. I'm terrible about social media. I just get mad every time I go to Facebook - I'm a dweeb! I do use twitter sometimes and will probably use that more. I post to Wanelo, and Pinterest. But I need to do a lot more work on social media, truly I do.

PFS: How are the other social medias beneficial to your Etsy site?

Jen:
I've had customers come to my shop after visiting my Pinterest boards - I'm pinterest.com/jenlownie/ if you want to go peek. And I do have a blog at vintageglassjewels.com. I post there semi-regularly and always mean to do more - I know google loves sites with new content and so Blogging More is definitely on my priority list.

PFS: Thank you for allowing me to interview you.

*****


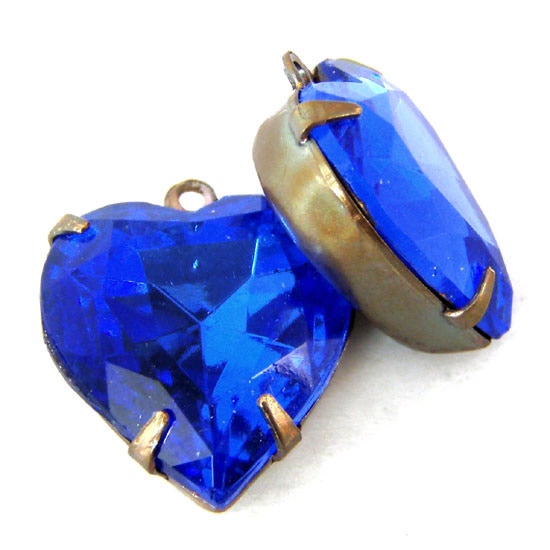
Today I have my first giveaway.  I am giving away some pieces from Weekendjewelry1.  I selected some beautiful trendy fall colors.  To enter you must comment on the interview sharing something about your experience selling jewelry online and then post a link to the interview/giveaway on your blog or Facebook.  For a second entry, sign up to follow my blog via e-mail and comment below that you have done so.  Giveaway ends Monday July 22, 2013 at 12:00 pm.  Name will be posted Tuesday July 23, 2013
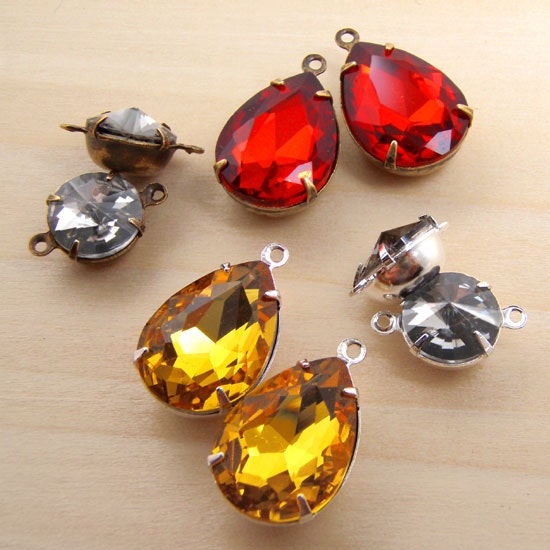
https://img1.etsystatic.com/018/0/22319073/icm_fullxfull.28956883_ls4n4ew7adscsk0k0888.jpg
Giveaway Pieces


Saturday, July 13, 2013

New Earrings

Ladies Night is over and it was a great success!  It is always great to see new faces and catch up with old friends.   Now that the event is over and I have another three months until the next one I will be working on restocking inventory and redoing my displays.

I have been working on some new designs with the buttons and other odds-n-ends I found the other day and I actually like them so, I thought I would share them with you.  I also had a custom order for an upcycled leather bracelet which is only in the beginning stages, but I will share that one with you as well.


This pair of earrings has a vintage look to them.  I started with buttons that have a lacy pattern to them and very pretty teardrop pearl in the center.  Playing off the "leather and lace" idea,  I added pearl colored leather cord, looping it through the hole on the back of the button, showing off a similar shape to the pearl of the button.  I then wire wrapped glass beads onto the ends and wrapped them together, adding a loop at the top.  I also mirrored the pearl with larger pearl drops at the bottom of the earrings.  


This pair of earrings has a geometrical-stempunk look to them.  I started with simple silver buttons with a diamond cutout pattern.  I then took black 24g wire and wrapped it several times around a diamond pattern on my Thing-A-Ma Jig, wire-wrapping the ends to finish it off.  The wire wrapped diamond reflects the pattern in the buttons.  I painted Vintaj silver patina over the wire, lightly wiping some of it away so the black would show through, giving it a worn/rustic look.  I added large black bicones, emphasizing the lines. 


This necklace has a boho look to it.  It starts with a translucent resin ring that has flecks and swirls of earthy green, gold, and brown colors and a slight iridescent sheen.  It is then wire wrapped to an olive green large hole bead.  In between the two are layers of jump rings which I have added similarly colored glass beads to and a single bright turquoise one to give it a pop of color.  I formed a ring and hook clasp and added leather cord to it. 

This bracelet was a special request.  It started with just the scraps of what use to be a leather belt.  It had the end with the holes and then about ten sections.  She loved the leather as it reminded her of when she was younger - a bit of nostalgia.  First, I designed a buckle that would work with the bracelet and then added a loop of wire, quartz, and a pearl...........now comes the watching and adjusting phase.  I will post the final design when I am finished.


I am also going to post a How-To for the buckle sometime next week.  I love how it turned out and it is pretty easy to do.  With leather bracelets and cuffs being the trend this fall adding a buckle that you have created yourself could be useful and just the right touch to your creation.   

Wednesday, July 10, 2013

Found Objects - What A Great Find!

Last night I had to run a few errands in the cities and ended up at an enormous fabric warehouse called S. R. Harris.  From the outside, the building looks a little raged around the edges and overgrown.  But, when you walk inside you see that it houses 30,000 sq ft of every sort of fabric bolt you can think of in addition to rows and rows and bins of notions and odds and ends.  My daughter needed fabric for her new line of fall clothing so we went in different directions.  I spent almost two hours rummaging through notion and odds and ends bins looking for something I could use for my jewelry designs.  I think I could have spent another two hours and still not been finished digging through the bins.  I am posting a few of the pieces I found; many are buttons, some are odds and ends, and some I think are pieces to be used for belt making.  I love the variety of textures, designs, and materials in these pieces and I also love the fact that they were not intended for making jewelry, but the possibilities could be endless.


Tuesday, July 9, 2013

Designing Around Color Palettes

Creating a color palette for your art can sometimes be a daunting task, even if you have formal training.  One of the challenges I discovered is that colors change and take on a different look when placed next to other colors.  For example, a green colored bead by it's self is just that a green colored bead, but place it next to blue or yellow and that green bead no longer seems like the green bead you started with.  Lighting can also change the color and in some cases drastically.  I have to take that in to consideration when I move my pieces from my home to my studio.  Yes, unfortunately, I am one of those who takes their work home with them and then stays up until 2 a.m. working on a project.....eek!

When I began following Art Bead Scene Blog I soon found that they have a very talented contributor who understands color and how colors compliment each other.  I then discovered a few days ago that she has her own blog and it opened up another dimension to my work.  Recently, she published a book on color and offered a competition to win one of her books (which would be awesome if I won).  She put together six color palettes and the requirement was to design something using one or more of the palettes.  So, I sorted through my beads and found colors that matched.  Because, I just discovered the competition yesterday and it ends tomorrow on the 10th, I did not have time to buy beads or hunt for some that would be more accommodating.....so the designs are interesting and certainly colorful.

Below I have posted the two I submitted - and I can already see the changes I could make......don't you hate when that happens?  Normally, when I design a piece I let it hang around the neck of my dress-form mannequin for a week or so.  I then make changes to it or scrap it, but I never just create something and make it available for sale.  This put me a little out of my comfort zone as I worked on the pieces last night and let the beads have their own way....... I hope you will find some inspiration from these two pieces and discover a new idea for your own.


-


Sunday, July 7, 2013

Ladies Night Out - Thursday July 11, 2013 FLASH SALE!

I hope all of you had a great 4th of July.  I had a fun day bumm'n around and enjoying the beautiful day.  This week is relatively hectic as I prepare for "Ladies Night Out".  Menomonie, WI has a main street event quarterly called "Ladies Night Out" where all of the small businesses on main street get together and host an event where they offer specials and giveaways.  Hundreds of ladies turn out for the event as it is a chance to get together with friends, make new friends - have a martini or two.. :-).. and stroll down main street seeing what's new in the stores and to get some great deals.  To add a little more fun to the event, I am going to offer a bit of a "Ladies Night Out - Flash Sale" for those who cannot make it to the event.  On Thursday July 11, 2013 from 3pm cst - 8pm cst at Ursylla Bs I will have a "FLASH SALE" - a sort of Ladies Night Out on line.  Just use coupon code BIG30 and enjoy 30% off everything in the store and all custom made requests. (Not valid on solar lights). 


Future Plans:

I would like to host a quarterly on line "Ladies Night Out".  If anyone is interested please let me know and I will e-mail you the outline and ideas I have for the event.  The next event would be October 31st, 2013.


Friday, July 5, 2013

Silver Swirls and Pearls

I enjoy reading other people's blogs.  One of the blogs that I follow had an article about spirals and she also created an Etsy "Treasury" about spirals.  When I think about spirals, I think about Robert Smithson's Spiral Jetty, Labyrinths, and Nautilus shells.  Spirals are also one of the oldest symbols and in some beliefs, they represent inner and outer consciousness, which I think is interesting.  I do not often design spirals into my jewelry, however, I guess if you consider coils similar to spirals - then perhaps I use them in my jewelry more often than I realize.  Today, as a bit of a change, I decided to design a pair of earrings with spirals. 


These earrings are made from aluminum wire that I formed, hammered, and then painted with Vintaj silver patina/ink.  I then added spirals of aluminum wire and cobalt blue glass beads.  In the center I added a silver coin pearl.  The ear wires are simple, hand-formed from stainless steel. 

I hope you are inspired to create something beautiful!


Fun Summer Button Earrings!

While I was out bumm'n around yesterday in the gorgeous sunshine, I found these really fun buttons.  The buttons are made by a company called Vision Trims.  The button card had a website address, but it did not come up when I searched for it.  However, several online craft sites carry other Vision Trim products.  The products are natural and earthy.  This particular set of buttons are made from coconut shells and have a multicolored leaf pattern glass top.

I made two of the buttons into a pair of earrings using 1.5mm leather cord, knotted, and jump rings.  The earrings are pretty simple but I love the color and texture of them. 


Thursday, July 4, 2013

How to Make a Found Object Leather Bangle

Happy 4th of July! 
It is hard to think of scarfs on such a beautiful summer's day like today but, today I found an object that I thought would make a great piece of jewelry.  I found a box of scarf rings; the rings that scarfs sometimes are hung on when they are shipped to a retail store.  They are the perfect size for a bangle.  Below are some simple step-by-step instructions on how to macrame' leather cord onto a plastic scarf ring to make a leather bangle.


In this picture I have two of the plastic rings, but you will only need one.  I also have 12 feet of 2mm leather cord.  The cord I chose has an off-white color with a shiny flash of pearl.  The leather has a bit of cracking to the surface, but I kind of like the effect. 


Fold the cord in half creating two equal lengths.  Tie the first macrame' knot.  Normally, when you macrame' you need four lengths of cord, two in the center and two on the outside to tie the knots.  In this design the plastic ring will serve as the two center cords.


Continue until you have completed the knots around the ring.


Bring the last piece of cord around the back and tie both ends in a knot. 

There are so many different variations you could create with this piece.  You could add beads to the cord ends if you would like.  I think you could also weave beads in the knot loops.  Tierra Cast has some smaller large hole metal beads that I think could add interest to the bangle. 

I hope this has inspired you to create something beautiful!

Tuesday, July 2, 2013

Mixed Media Part 2

The jar of leather pieces, that I wrote about in earlier blogs, has been quite the challenge and also a lot of fun.  In these next three pieces I used mostly metal and leather, but the earrings have a lot of different materials and I think they are my favorite. 


These earrings have a bohemian look to them.  I started with the warm caramel leather piece folded over and riveted together with Tierra Cast textured copper heish and rivets.  I then added a free-form wire wrapping of coconut heishi, golden freshwater pearls, and green sea glass.  I also added a multicolored Sari silk yarn and soft gray wool yarn.  I love the texture and lines - and the warm and cool earthy colors.


This necklace piece uses the warm caramel and a soft earthy gray leather pieces and gray leather cord.  I added Tierra Cast textured copper heishi and rivets as well as two textured copper beads, a few jump rings, and a Nunn Design copper branch.


This bracelet starts with a narrow brass cuff.  I then wove natural tone leather pieces onto the cuff and riveted the ends to the piece and closed it off by forming the cuff ends over.  Next, I wove and knotted red leather cord in between the leather pieces giving it a pop of color.

I will post these to ursyllabs.etsy.com by tomorrow afternoon sometime.  

Art Bead Scene Blog has posted their Challenge for July........

Art Bead Scene has posted the challenge inspiration for July.  The artist is Pablo Picasso.  The painting on the left is of his wife Olga and was painted in 1917, it is the inspiration for this month's Art Bead Scene Blog Challenge.  On the right is a painting of his mistress Marie-Thérèse, painted in 1932.    I posted the painting of his mistress Marie-Thérèse also, to show the difference in his style.  Most are more familiar with Picasso's cubism and abstract form rather than his beautiful portrait and classical paintings from his earlier years.

I think it is interesting that the form of Olga has a more rounded three-dimensional look to it with her form casting shadow against the wall, and the chair has a flat, almost tapestry look to it.  I think it is funny that the chair also seems to not have any legs; It looks suspended in air or attached to the wall.  I love the porcelain look to her skin, it reminds me of a marble sculpture.  Her hand draped over the edge of the chair seems to be inspired by Adam's hand in the painting on the Sistine Chapel's ceiling by Michelangelo.  Her dress is beautiful with its satiny soft drape and folds, and hints of delicate red rose patterned throughout.  I also love the transparency of her sleeves and trim.  However,  I am more drawn to the colors and shapes in the floral/botanical pattern in the chair than I am of her face and features.  The more I look at it, the more the chair reminds me of the black velvet paintings of the 70s....lol..

As always, I am never certain the direction I am going to take.  I am drawn to the floral/botanical pattern and the rich colors and shapes, however, I also like the hints of roses in her dress and the satiny look to the material.........hmmmm.  I will have to look at the painting a few days longer before I decide. 

   
"Olga in an Arm Chair", Picasso, 1917